Local Data storage for Electron
2020年5月3日 • ☕️☕️ 8 min read

Electron is a great framework to build cross-platform applications. With Electron, we can easily build the desktop application by using web techniques.
Using Electron can let us easily create cross-platform applications on top of web technologies. Since Electron app is still kind of web app, when talking about storing data, we are used to storing the data in remote servers via sending HTTP requests.
What if I want to store the data locally?
In this article, I will share my experience in building an Electron application with persistent local data storage.
Local Data storage for Electron
Simple use case
In simple use cases, two options might be your go-to:
- Browser localStorage: Electron is built on Chromium, that is browser localStorage is well supported.
- electron-store: For simple scenarios, just go for electron-store. The API is easy to use
Complicated use case
Considering storing your data in the SQL or NoSQL like database would be a better idea when use cases are a bit complicated.
After doing some researches and leveraging between SQL and NoSQL with Electron, I end up going to NoSQL solution.
I am going to introduce the way to integrate nedb with your Electron app.
As NeDB doc said, NeDB is
Embedded persistent or in memory database for Node.js, nw.js, Electron and browsers, 100% JavaScript, no binary dependency. API is a subset of MongoDB’s and it’s plenty fast.
I am significantly pleasure using NeDB to build my production-ready product.
Build a todo list Electron app with NeDB
To help you get the idea, let’s build a Todo list Electron app with NoSQL storage.
Install Electron
To help you understand the idea quickly, let’s use electron-quick-start template and have the quick experience
Follow the installation instruction:
# Clone this repository
$ git clone https://github.com/electron/electron-quick-start
# Go into the repository
$ cd electron-quick-start
# Install dependencies
$ npm install
# Run the app
$ npm start
Create folders
Create a db folder. Then, create schemas and stores folder under db.
The repo should look like:
.
├── LICENSE.md
├── README.md
├── db
│   ├── schemas
│   └── stores
├── index.html
├── main.js
├── package-lock.json
├── package.json
├── preload.js
└── renderer.js
Install nedb-promises
nedb-promises is a wrapper around nedb. With promise can save you tons of time to handle the callback.
$ yarn add nedb-promisesInstall ajv
ajv is a JSON schema validator library. Schema validator is optional to build the NoSQL database, but I’d recommend using it since well-defined schema and validator can bring better maintainability.
NIT: You can also replace ajv to your preference schema validator
$ yarn add ajvCreate a todo list schema
Let’s destruct the component of a todo list app.
A todo list app should have a list of todo item. A simple todo item would include todo content, is it finished?
The schema will be:
db/schemas/todoItem.js
const todoItemSchema = {
  type: 'object',
  properties: {
    content: {
      type: 'string',
    },
    isDone: {
      type: 'boolean',
      default: false
    }
  },
};

module.exports = todoItemSchema;
Create a todolist store
The store will contain the interface to Create / Update / Delete the NeDB.
Main thread will import this store and Renderer thread will call these methods.
First, init the NeDB, validator in the constructor
db/stores/todoItem.js
const Datastore = require('nedb-promises');
const Ajv = require('ajv');
const todoItemSchema = require('../schemas/todoItem');

class TodoItemStore {
    constructor() {
        const ajv = new Ajv({
            allErrors: true,
            useDefaults: true
        });

        this.schemaValidator = ajv.compile(todoItemSchema);
        const dbPath = `${process.cwd()}/todolist.db`;
        this.db = Datastore.create({
            filename: dbPath,
            timestampData: true,
        });
    }
}
Then, add methods to control the data.
db/stores/todoItem.js
const Datastore = require('nedb-promises');
const Ajv = require('ajv');
const todoItemSchema = require('../schemas/todoItem');

class TodoItemStore {
    constructor() {
        const ajv = new Ajv({
            allErrors: true,
            useDefaults: true
        });

        this.schemaValidator = ajv.compile(todoItemSchema);
        const dbPath = `${process.cwd()}/todolist.db`;
        this.db = Datastore.create({
            filename: dbPath,
            timestampData: true,
        });
    }

    validate(data) {
        return this.schemaValidator(data);
    }

    create(data) {
        const isValid = this.validate(data);
        if (isValid) {
            return this.db.insert(data);
        }
    }

    read(_id) {
        return this.db.findOne({_id}).exec()
    }

    readAll() {
        return this.db.find()
    }

    readActive() {
        return this.db.find({isDone: false}).exec();
    }

    archive({_id}) {
        return this.db.update({_id}, {$set: {isDone: true}})
    }
}

module.exports = new TodoItemStore();
Since the goal of the article is sharing the way to integrate NeDB with Electron, I won’t elaborate the API of NeDB too much. You can get the idea first and spend some time to go through the NeDB afterwards.
Worth noticing, we init the class when exporting the module. This tactic help you to keep one Store instance across the application.
Since this is a simple example, there is only one store. In real-world cases, you can use the same structure to extend the application.
Integrate everything
So far, we’ve finished all works for controlling the database. The repo should look like:
.
├── LICENSE.md
├── README.md
├── db
│   ├── schemas
│   │   └── todoItem.js
│   └── stores
│       └── todoItem.js
├── index.html
├── main.js
├── package.json
├── preload.js
├── renderer.js
└── yarn.lock
Now, let’s wrap everything up.
Update main.js
main.js is the main thread of Electron. Update main.js with
- require
./db/stores/todoItem - assign
todo store instanceto a global variable - Enable
nodeIntegrationinwebPreferencesoptions. The reason is the renderer thread willrequireelectron method. To do so, renderer thread should havenodeIntegration
main.js
// Modules to control application life and create native browser window
const {app, BrowserWindow} = require('electron')
const path = require('path')
const db = require('./db/stores/todoItem');

global.db = db;

function createWindow () {
  // Create the browser window.
  const mainWindow = new BrowserWindow({
    width: 800,
    height: 600,
    webPreferences: {
      nodeIntegration: true,
    }
  })
  mainWindow.loadFile('index.html')
}

...the same...
Update renderer.js
First, get the db instance from main thread
renderer.js
const {remote} = require('electron');
const dbInstance = remote.getGlobal('db');
With dbInstance, we can use defined methods to update db.
We can read all todo lists by
dbInstance.readAll()
    .then(allTodolists => {
        console.log(allTodolists)
    })
Or we can close the todo item by
dbInstance.archive("really-fake-id")
    .then(() => {
			console.log('done')
		})
So we can start to add the view logic. I will skip the explanation of the View layer, since there are many ways to do that.
The final implementation: https://github.com/ctxhou/electron-nedb-todolist
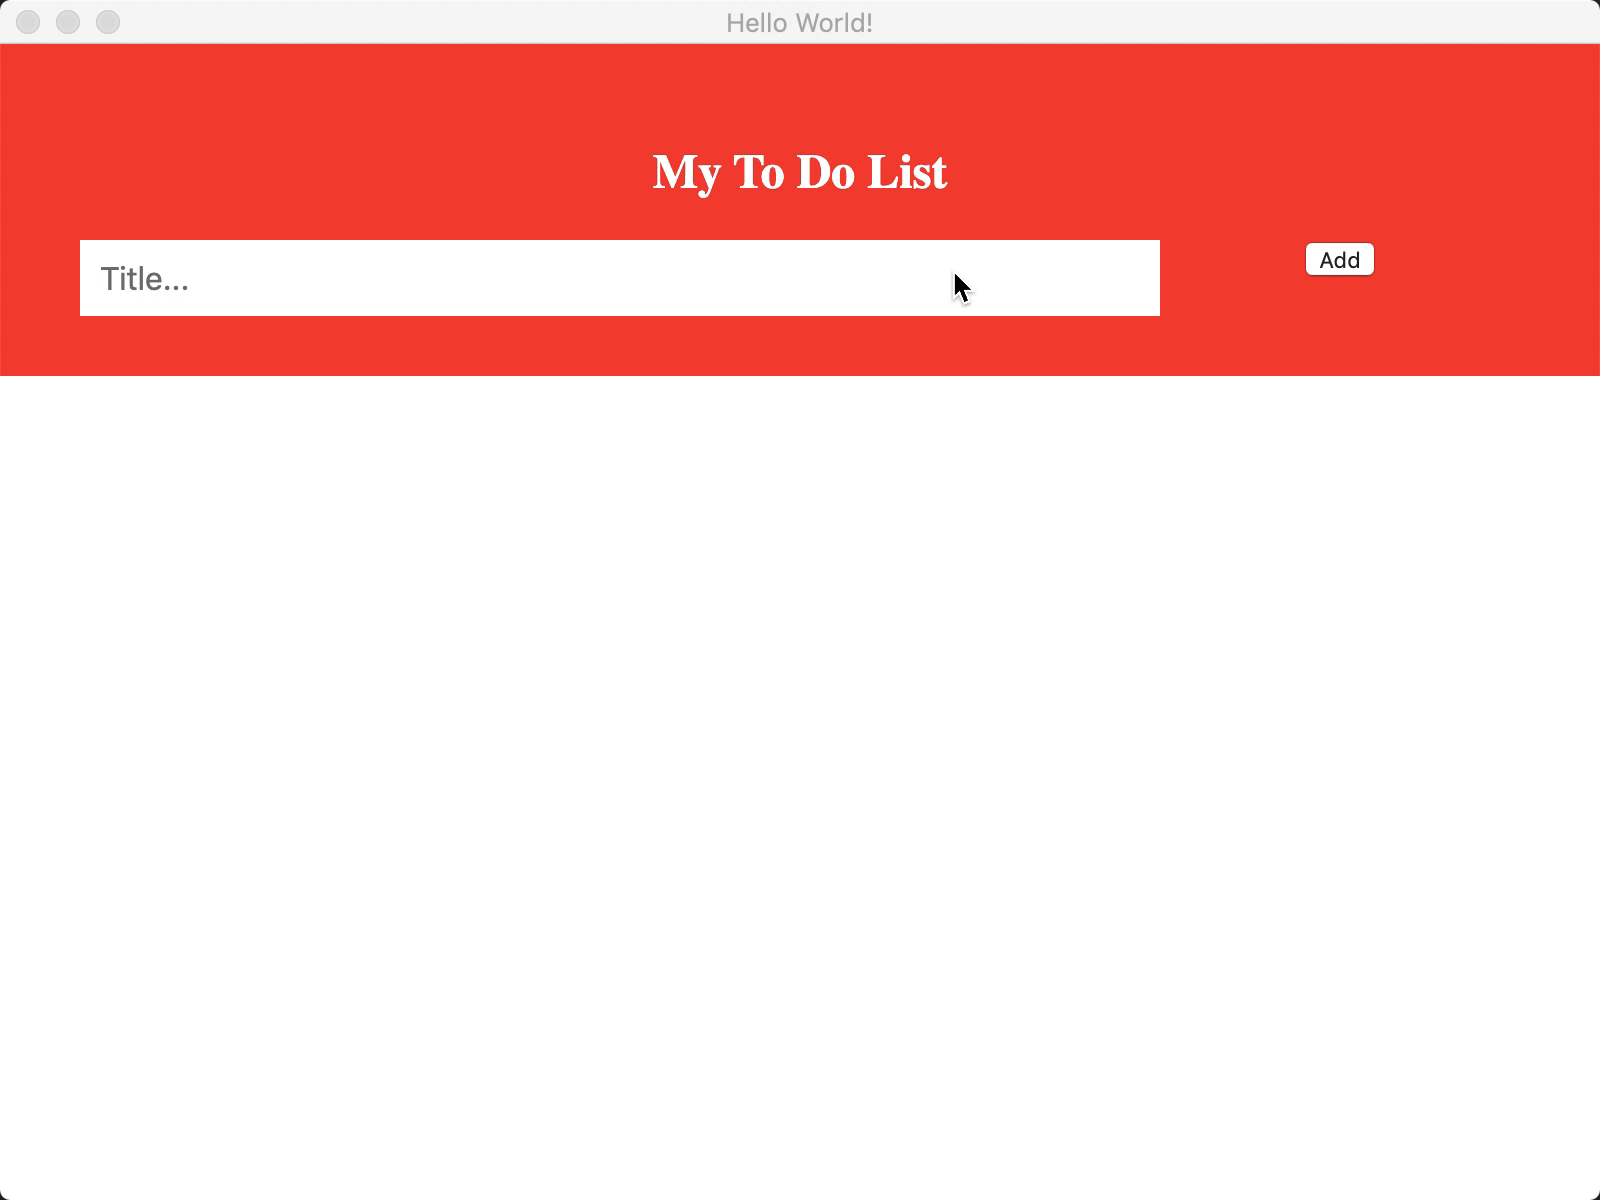
Our Nedb + Electron Todo list will look like
Conclusion
After trying different solutions, I am satisfied with this structure. The benefits are
Separate data logic from main thread and renderer thread
Electron doesn’t have the strict limitation of data flow. You can store the data in localStorage, or store the data in main thread and expose it to global. Or, you can also use electron-store for simple key-value storage.
When the application grows bigger and bigger, the data flow will become harder to maintain. You may have a copy in localStorage, and if you are using client state management framework, like redux, client side will also have another copy.
The data flow will become a mess without proper data flow.

Introducing NeDB with this structure not only brings the clear data flow but having the clearer boundary between Main thread, Renderer thread and data storage. It’s like introducing the MVC like design pattern to the Electron application.

Of course, you still can add the data to localStorage. But with methods to access all your data from database, in most of cases, you don’t need to save the data in localStorage.
DB logic is extendable
The demo is a simple case. In the real world case, you can add cache to improve the performance, or add more validation to secure the db access.
Plus, NeDB always stores the data in a text file, so it’s straightforward to realize data import/export.
Testable
This is the most important benefit to me. As above example, writing unit tests for each store class is achievable.
Plus: View layer
You can use any view framework you like. If you are using react + redux, instead of calling the web request, just put the dbInstance in your actions and call the db method in different actions.
Thanks for reading. This is my personal experience in using NeDB as Electron db. Let me know how you think!